Confession, I have a box full of baby clothes in a closet that I am keeping with the plans of making a quilt with all the sweet little outfits that I can't bear to part with. This would be a perfect idea except for the fact that I have never made a quilt in my life, have no idea where to start and a lot of the fabrics involved are knit or fleece which means its not going to be the most straighforward quilt in the world to make!
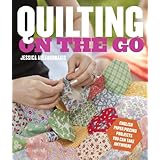
Last year I spent a bit of time thinking about the logistics of how I'm going to make this quilt and during my research I came across english paper piecing. The idea of this type of quilting appealed to me since a) I'm not a fan of sitting at a sewing machine for hours and hours and b) I think it will be nice to handwork all these special fabrics which hold so many memories. So for my birthday I asked for this book.
I cannot say enough great things about this book, it is beautiful to read regardless of whether you are intending to ever sit down and do any english paper piecing. The pictures of all the projects are stunning and the directions made me think that even with my limited sewing skills I could possibly, one day, sit down with my baby clothes and make something beautiful with them!
Before I did that however I thought it might be a good idea to try and make one or two of the projects in the book to get some practice with the technique, see if I could do it and if I enjoyed it. This little sewing kit is my first attempt and I have to say that it was actually fun, and both easier and faster than I was expecting it to be!
For this kind of quilting you make little paper templates and then baste your fabric around them (this project didn't require a whole lot of fabric so I went through what I had lying around and picked fabrics from there).
All the little hexagons (or whatever shape/pattern you are making) then get whipstitched together and the paper templates are removed.
Then you quilt like normal, I quilted mine exactly as they showed in the book (since this is the first time I've ever quilted anything!) with these little triangles which turned out really nicely.
And finally, ta da... the final mini sewing kit bound with binding which I also made using instructions in the book. All in all I can say I am so happy with how this turned out and am already planning my next project (and maybe even tentatively starting to think about how that quilt is going to go!).
A dear friend and I were talking a while ago about how she wanted to learn to juggle and I offered to teach her when we found the time. This got me to thinking about the perfect birthday gift for her....juggling balls!! I worked out the pattern on a set for me in plain colors but for her I wanted to do something fancy so I went with rainbow juggling balls. They are so happy and I really love them. Makes me want to make some fancy ones for me too!!!
Abbreviations
sc single crochet
sc2tog single crochet 2 together (decrease). Insert hook into stitch and draw up a loop. Insert hook into next stitch
and draw up a loop. Yarn over, draw through all 3 loops on hook.
2sc 2 single crochet into one stitch.
Materials
US E4/3.50mm crochet hook
Worsted weight yarn in red, orange, yellow, green, blue and purple (I used red heart super saver)
Stitch marker
Yarn needle
Poly-fil plastic pellets/stuffing beads (this is what I used, you could use rice or beans alternatively).
Notes
This pattern is worked in a continuous spiral, do not join or turn, just start the next round right after the last stitch on the last round.
Use a stitch marker to mark the beginning of each new round.
I start with a magic ring, you can find a tutorial for that here.
When I changed yarn I secured the yarn ends by knotting together the two yarn ends on the inside of the ball, in this way there is no need to darn in the ends.
Pattern
Using red yarn, make a magic ring
Rnd 1: 6 sc in magic ring (6)
Rnd 2: 2sc in each stitch (12)
Rnd 3: (2sc, sc) repeat to end of round (18)
Change to orange yarn
Rnd 4: (2sc, sc, sc) repeat to end of round (24)
Rnd 5: (2sc, sc, sc, sc) repeat to end of round (30)
Rnd 6: (2sc, sc, sc, sc, sc) repeat to end of round (36)
Change to yellow yarn
Rnds 7-9: sc around (36)
Change to green yarn
Rnds 10-12: sc around (36)
Change to blue yarn
Rnd 13: sc around
Rnd 14: (sc2tog, sc, sc, sc, sc) repeat to end of round (30)
Rnd 15: (sc2tog, sc, sc, sc) repeat to end of round (24)
Change to purple yarn
Rnd 16: (sc2tog, sc, sc) repeat to end of round (18)
Rnd 17: (sc2tog, sc) repeat to end of round (12)
Rnd 18: (sc2tog) repeat to end of round (6).
Cut yarn leaving a long tail. At this point I found the hole left was large enough to put a funnel into and fill the ball with the poly pellets (if you don't find this you may need to add the pellets after rnd 17). I stuffed the ball as much as I could and then weighed it, all my balls weighed 3oz but it is most important that they all weigh roughly the same as this will make them easier to juggle (this step can be skipped if desired).
Close up hole and darn in yarn end.
Ta da, done, happy juggling!!
My daughter is a HUGE frozen fan (along with every other 3 year old girl alive right now it seems!!). So I wanted to make her winter hat frozen inspired. I didn't want it to be over the top frozen but just subtle enough that she would know that it was frozen while to the rest of the world (or at least anyone who didn't know her frozen obsession) it was just a cute winter hat.
I chose to make the main hat a white earflap in chunky yarn, and then added Elsa-inspired yellow braids and a turquoise snowflake detail on the front. She LOVED it, especially the braids and has loved wearing it all winter.
The pattern is my own pattern. I do not currently sell this hat or this pattern in my etsy shop but would consider it if there was interest.
A dear friend requested some earflap hats from my etsy shop for her 4 kids for Christmas. She has two beautiful girls who are 6 and 5 and two sweet little boys who are 3 and 1. We were close friends when her girls were little and then they moved away so I am yet to meet the two little guys.
For the girls she chose two styles that I already had in the shop and for the boys she switched things up a little requesting this hat but with a red stripe instead of blue for the older boy and this hat for the baby but without the braids (she thought he would find them annoying). I think they turned out great!
I love making custom orders so if you would like to switch things up from the styles I have available just drop me a line!
For day twenty four there is no ornament....Christmas overtook me and I still had a lot of christmas-related crafting/baking/shopping/socialising etc...! to do so for day twenty four each kid got a large chocolate santa. They were totally happy with this!! Maybe next year I'll try and get on top of making the final ornament (or maybe they will get chocolate santas every year!!). Anyway, here is the final calendar.
Happy Christmas!
I was so happy with the way this little snowman turned out. Like Santa he was quite a bit bigger than he was supposed to be so I may be working on another snowman next year but this one will look cute as a real tree ornament or something!!! I used a whole bunch of pinterest pictures for my inspiration but made the actual pattern up myself.
Materials:
Size 3 double pointed needles.
I was using this project as a way of using up yarns from my stash so while these are the yarns that I used, it is OK to use different yarns (for example all fingering or all lightweight), be aware that the size of the finished snowman may change however.
Fingering (weight 2) yarn for the body and hat (I used this in bark for the belt and in cream for the body) .
Lightweight (weight 3) yarn for the scarf (I used this yarn and this yarn).
Polyfil stuffing.
Black embroidery thread.
Abbreviations:
k = knit.
m1 = make 1 stitch, from the front, lift the loop between stitches with left needles, knit into the back of the loop.
kfb = knit front and back.
k2tog = knit two stitches together
ssk = slip slip knit (Slip the next 2 stitches knitwise to the right needle. Insert the left needle into the
fronts of these two stitches and knit them together).
Head/Body:
Use size 3 needles. Starting at the top of the head cast on 9 stitches in cream and divide between 3 needles. Join to work in the round.
Round 1 knit.
Round 2 k1 (m1, k1) repeat to end (17 stitches).
Round 3 knit.
Round 4 k1 (m1, k2) repeat to end (25 stitches).
Round 5 knit.
Round 6 k1 (m1, k3) repeat to end (33 stitches).
Rounds 7-18 knit.
Round 19 k1 (k2tog, k2) repeat to end (25 stitches).
Round 20 knit.
Round 21 k1 (k2tog, k1) repeat to end (17 stitches).
Round 22 knit.
Round 23 k1 (m1, k2) repeat to end (25 stitches).
Rounds 24-31 knit.
At this point darn in the cast on thread and stuff firmly .
Round 32 k1 (k2tog, k1) repeat to end (17 stitches).
Round 33 knit.
Round 34 k1(k2tog) repeat to end (9 stitches).
Finish
any stuffing, cut the yarn, thread it on a yarn needle and draw it
through the remaining stitches, pulling tight to close the hole. Darn in
end.
Hat:
Use size 3 needles. Cast on 6 stitches in brown and divide between 3 needles. Join to work in the round.
Round 1 knit.
Round 2 kfb in every stitch (12 stitches).
Round 3 knit.
Round 4 (k1, m1) repeat to end (18 stitches).
Round 5 knit.
Round 6 purl.
Rounds 7-12 knit.
Round 13 (k1, m1) repeat to end (36 stitches).
Round 14 knit.
Cast off and darn in ends
Scarf:
Use size 3 needles. Cast on 4 stitches using turquiose yarn, keep them on one needle and work back and forth between two needles.
Row 1 knit.
Row 2 purl.
Switch to orange.
Row 3 knit.
Row 4 purl.
Switch to turquoise.
Repeat these 4 rows until you have about 3 inches and cast off.
Repeat the above pattern to make a scarf piece which is 2 inches long.
Nose:
Using orange yarn make three knots around a small needle which is pushed into a pincushion. Remove from the needle and sew onto the snowman's head using the long tails.
Finishing:
Using a yarn needle sew the hat to the top of the head. To make the scarf put the longer piece around the neck of the snowman in a loop and sew the two ends together. Then take the shorter piece pass it under the loop so one end hangs down on one side and one on the other as shown in the picture (this makes it look like the scarf is tied but is less bulky). Secure the two ends to the snowmans body.
Embroider eyes using french knots and a mouth according to the picture.
I looked and looked for a santa pattern that I liked but I had no luck so ended up making my own. The final product was quite a bit larger than I had really intended it to be but by that point there was no way I was going back and starting again so this year Santa (and the snowman, see tomorrow's post!) is going to be GIANT!!. Maybe next year I will make something smaller!!
He did turn out very jolly though and Santa is supposed to be round and fat right!!!
Materials:
Size 3 double pointed needles.
Size 6 needles.
Lightweight (weight 3) yarn (I used this in linen for the face, this red for the body/hat, this white for the hat rim and this in bark for the belt (the last yarn is actually fingering yarn but it was just what I happened to have in my stash - these small projects are good for using up leftover yarn!)).
Worsted (weight 4) yarn for the beard (I can't find the information on the yarn I used but it was very fluffy).
Polyfil stuffing.
Black embroidery thread.
Abbreviations:
k = knit.
kfb = knit front and back.
k2tog = knit two stitches together
ssk = slip slip knit (Slip the next 2 stitches knitwise to the right needle. Insert the left needle into the
fronts of these two stitches and knit them together).
Head/Body:
Use size 3 needles. Starting at the top of the head cast on 6 stitches in linen and divide between 3 needles. Join to work in the round.
Round 1 kfb in each stitch (12 stitches).
Round 2 knit.
Round 3 (k, kfb) repeat to end (18 stitches).
Round 4 knit.
Round 5 (k2, kfb) repeat to end (24 stitches).
Round 6 knit.
Round 7 (k3, kfb) repeat to end (30 stitches).
Rounds 8-12 knit.
Switch to red yarn.
Rounds 13-21 knit.
Switch to brown yarn.
Rounds 22-23 knit.
Switch to red yarn.
Rounds 24-25 knit.
Round 26 (k3, k2tog) repeat to end (24 stitches).
Round 27 knit.
Round 28 (k2, k2tog) repeat to end (18 stitches).
At this point darn in the cast on thread and stuff firmly .
Round 29 knit.
Round 30 (k, k2tog) repeat to end (12 stitches).
Round 31 (k2tog) repeat to end (6 stitches).
Finish
any stuffing, cut the yarn, thread it on a yarn needle and draw it
through the remaining stitches, pulling tight to close the hole. Darn in
end.
Arms:
Use size 3 needles. Starting at the hands cast on 6 stitches in linen and divide between 3 needles. Join to work in the round.
Round 1 knit.
Round 2 (k2, kfb) repeat to end (9 stitches).
Switch to white.
Round 3 knit.
Switch to red.
Rounds 4-10 knit.
Cast off, darn in the cast on thread and stuff firmly.
Hat:
Use size 3 needles. Cast on 30 stitches in white and divide between 3 needles. Join to work in the round.
Round 1 knit.
Round 2 purl.
Switch to red.
Rounds 3-6 knit.
Round 7 (k3, k2tog) repeat to end (24 stitches).
Rounds 8-12 knit.
Round 13 (k2, k2tog) repeat to end (18 stitches).
Rounds 14-20 knit.
Round 21 (k2, k2tog) repeat to end (12 stitches).
Rounds 22-26 knit.
Round 27 (k2tog) repeat to end (6 stitches).
Rounds 28-32 knit.
Cut the yarn, thread it on a yarn needle and draw through the remaining stitches pulling tight to close the hole. Darn in end.
Beard:
Use size 6 needles. Cast on 9 stitches, keep them on one needle and work back and forth between two needles.
Row 1 k3, cast off 3, k3.
Row 2 k3, cast on 3, k3.
Row 3 k, ssk, k3, k2tog, k (7 stitches).
Row 4 knit.
Row 5 k, ssk, k2, k2tog, k (5 stitches).
Row 6 knit.
Row 7 k, ssk, k2tog (3 stitches).
Row 8 knit.
Cast off, darn in ends.
Finishing:
Sew the arms to the side of the body, the hat to the top of the head and the beard to the front of the face according to the picture.
Embroider eyes on the face using french knots.